Real cashew-based vegan brie
| Tags: | Fermentation, Gluten free, Soy free, Vegan cheese and eggs |
|---|---|
| Preparation time: | preparations 50 minutes, cooking 10 minutes, total 60 minutes |
| Makes: | 1 cheese wheel |
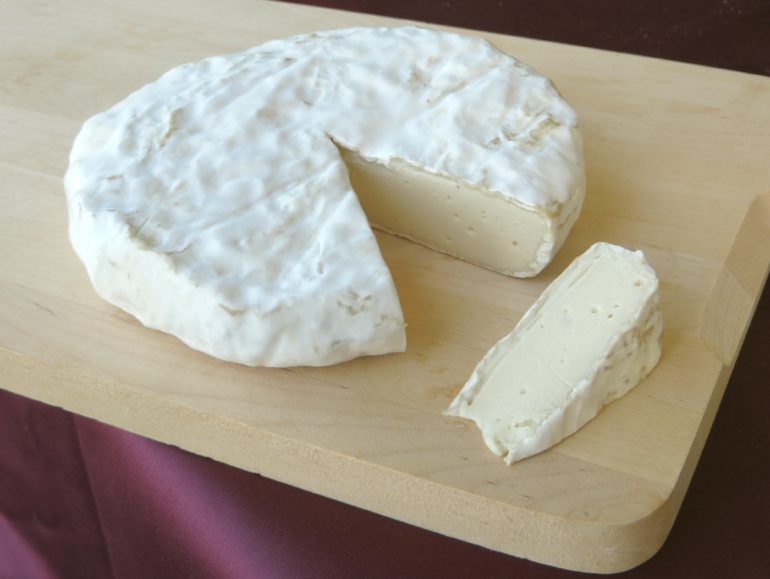
That's right, this is a homemade vegan brie with real mold! It's super creamy, with an strong brie flavor and a firm rind. This recipe is based on those by Full of Plants and Lecker Planzen. Their cheeses are made almost entirely from cashews. I wanted to have creamier cheese similar to ripe brie, so my recipe has more water and coconut oil. The coconut oil also helps the cheese set once it's placed in the fridge, also making it easier to handle.
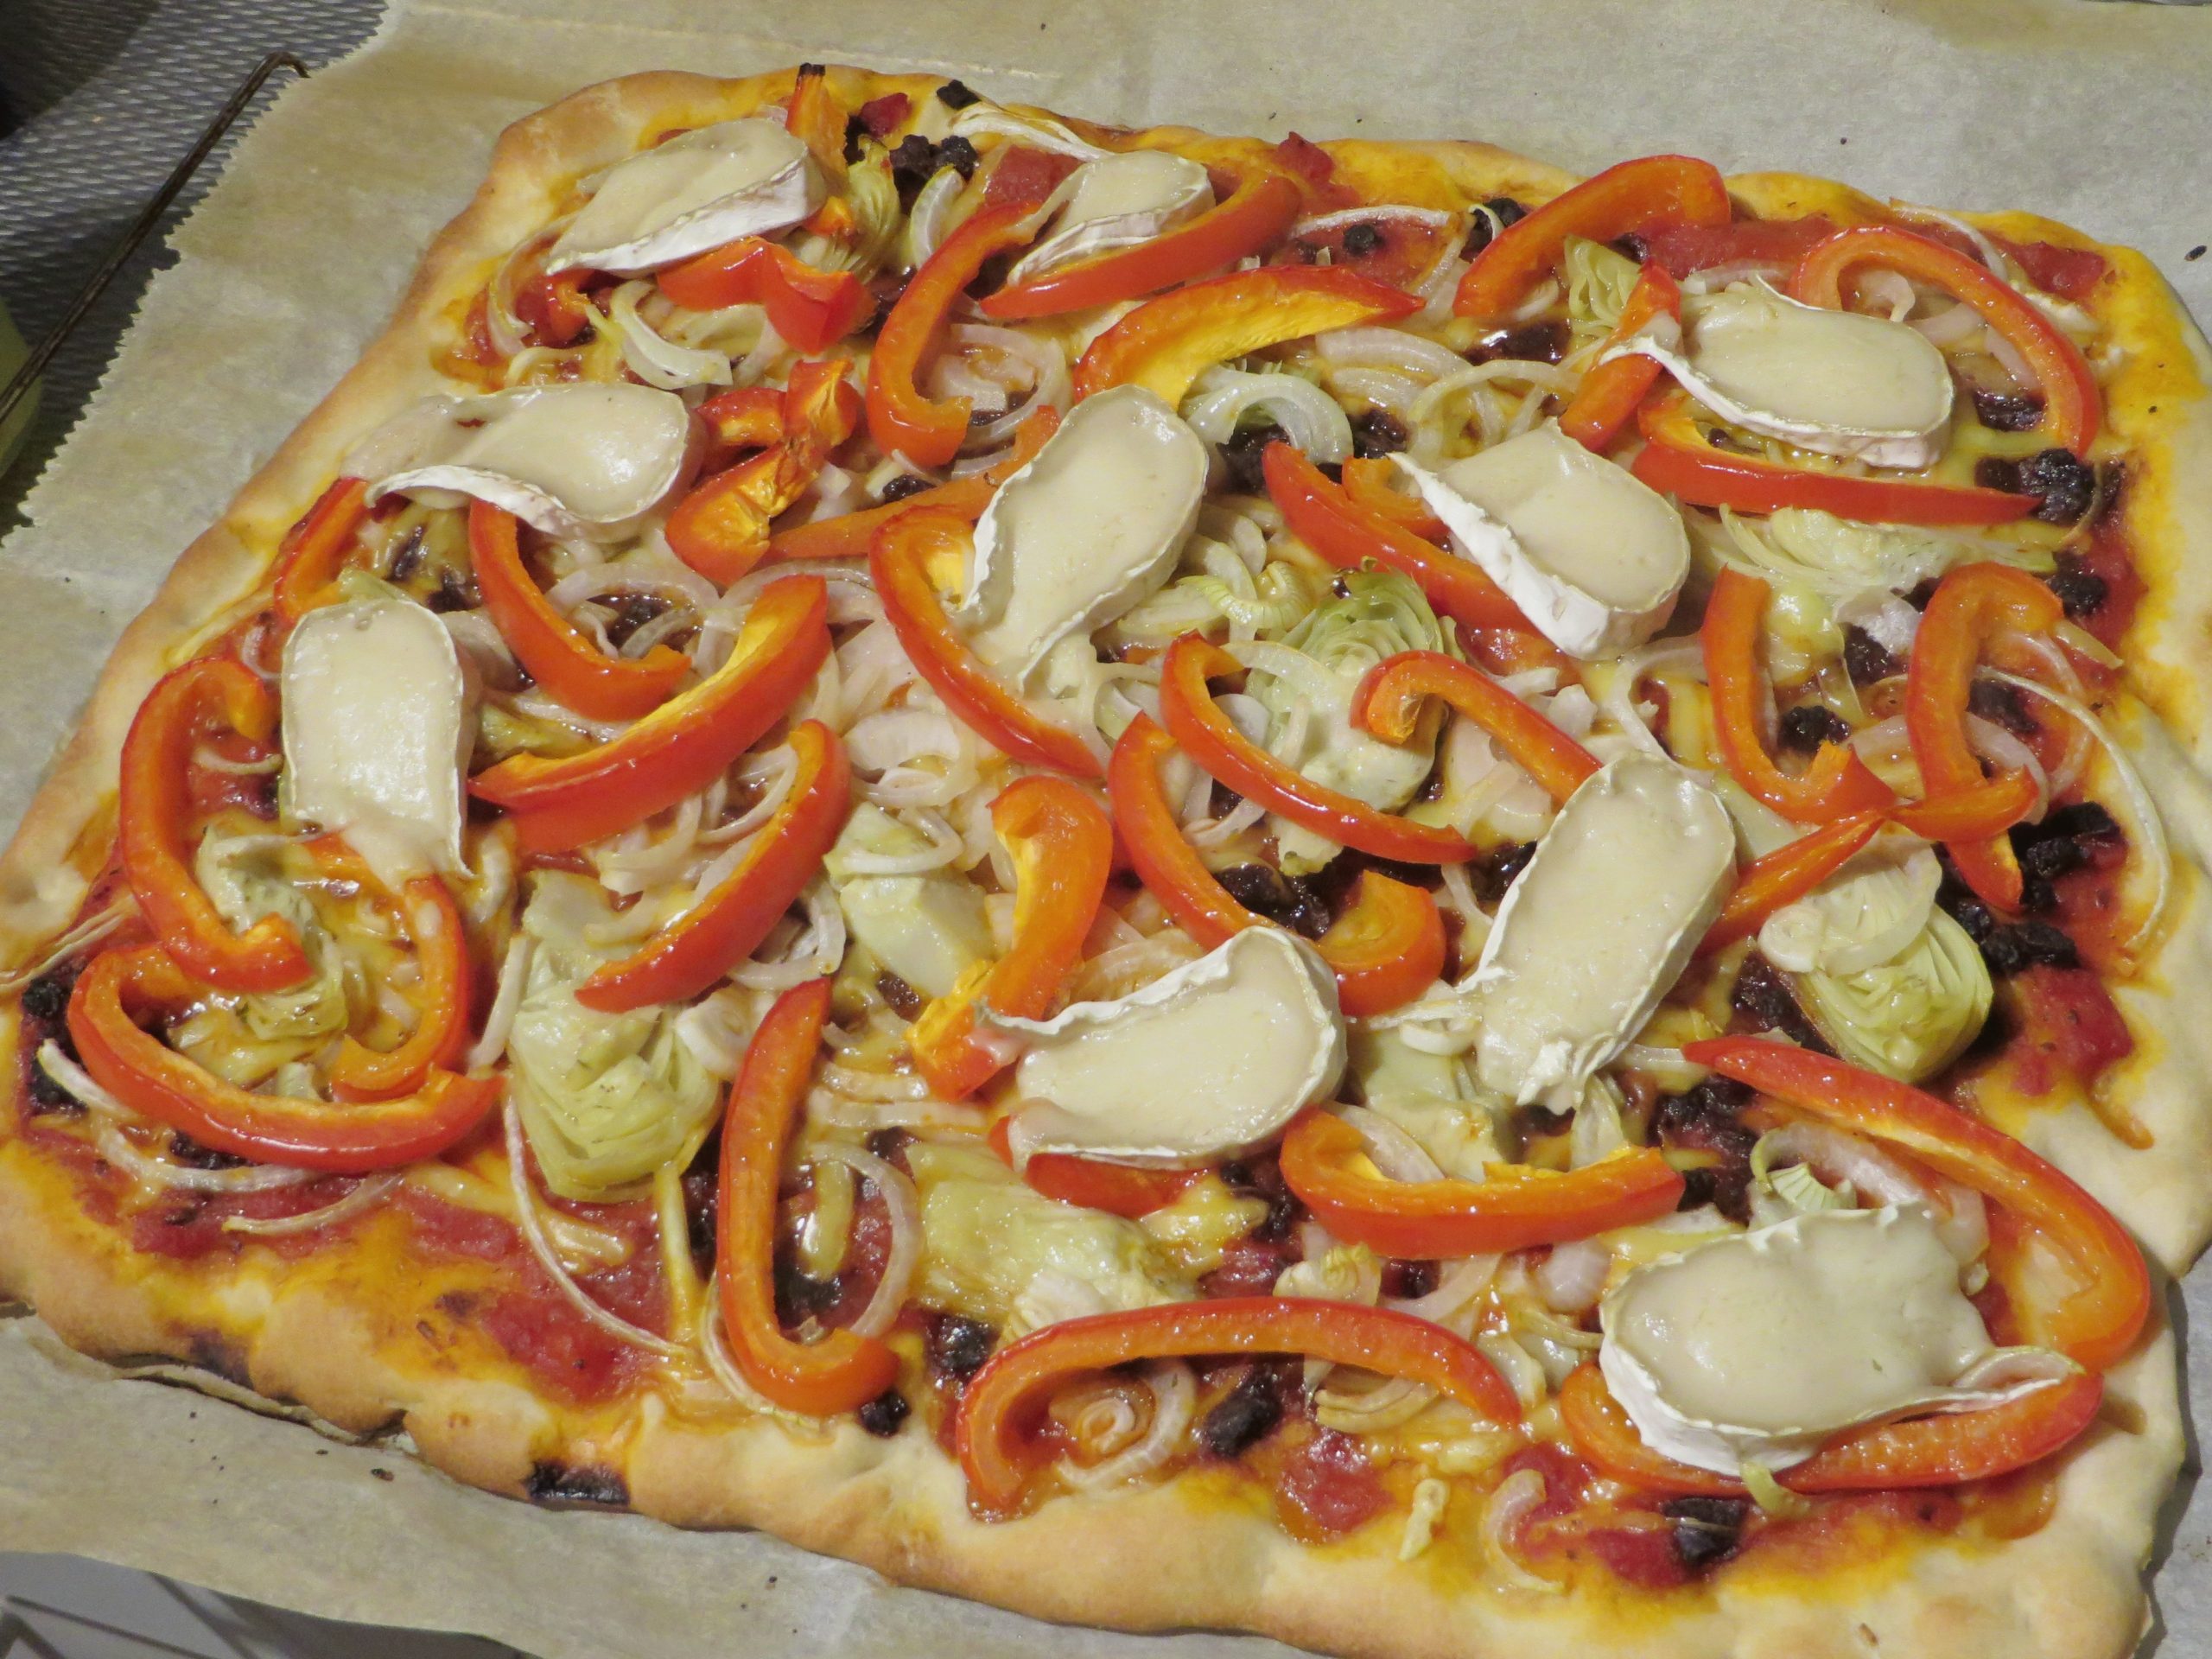
An added advantage of a higher moisture and fat content is that the cheese melts more easily. This makes it very suitable for use on pizzas and casseroles. Add it in the last five minutes of baking so it melts, but does not evaporate too much. In the picture you see it melted on a pizza with tomato sauce, artichokes, thinly sliced onion and red peppers.
Many people are a bit afraid to make fermented foods at home, let alone grow fungus in their fridge! However it's really quite safe, if you just work clean and make sure no fungi other than the white mold grow on your cheese. You do not need a lot of special equipment for this recipe, just a strong blender or food processor, a lidded plastic container and a fridge. You will need some patience, but it is 100% worth it.
The vegan mold culture can be ordered online, for instance from Cashewbert. This recipe works with both the powdered and liquid culture. Previously I have experimented with using a 1 inch/2 cm piece of rind from a store bough vegan camembert for the starter. This usually works, but only for one generation of cheese. You cannot propagate the culture. However, it's an easy way to give this recipe a try without having to buy in cultures.
Ingredients
- 1 cup (130 g) raw cashew nuts
- 1/3 cup (80 ml) water
- 1/4 cup (60 ml) refined neutral coconut oil, melted
- 1 tablespoon soy or coconut yogurt with live cultures
- 1/16 teaspoon or 1 droplet of penicillium candidum culture
- 1/3 teaspoon non-iodized salt
Instructions
Bring water to a boil and cook the cashews for 10 minutes until soft. Drain and allow them to cool a little.
Add the cooked cashews to the jar of your blender or food processor along with the water, coconut oil, yogurt, penicillium candidum and salt. Blend into a smooth mass. Depending on the strength of your machine, this could take a few minutes. Add one or two tablespoons more water if needed to help the blending.
Take a flat bottomed round bowl that can serve as a cheese mold and cover it with plastic wrap. Pour the cheese mixture into the mold. Cover and put the cheese into the fridge for 8 to 16 hours so it can firm up.
Once the cheese is set, carefully peel away the plastic wrap and place the cheese onto a piece of parchment paper, in a sealed plastic container that is large enough so the cheese has a little space to breathe. Make sure to touch it as little as possible with your bare hands, so you do not contaminate it with the wrong molds or bacteria, especially in the beginning. Place the container in a room where the temperature is between 11 and 15 degrees C / 50-60 F. If you do not have such a room, the least cold spot in your fridge will do if you don't set it super cold (often the top shelf is warmest).
The cheese now needs to ripen for about 3 weeks at this temperature. Turn it over every day with the aid of a piece of parchment paper. If there is condensation on the sides of the container, wipe it off with a paper towel. Replace the parchment paper when it gets wet. The sealed container helps to keep humidity high, but it should not get overly wet inside. The cheese's odor can change from day to day, from fruity to sour or even a bit yeast like. This is all fine.
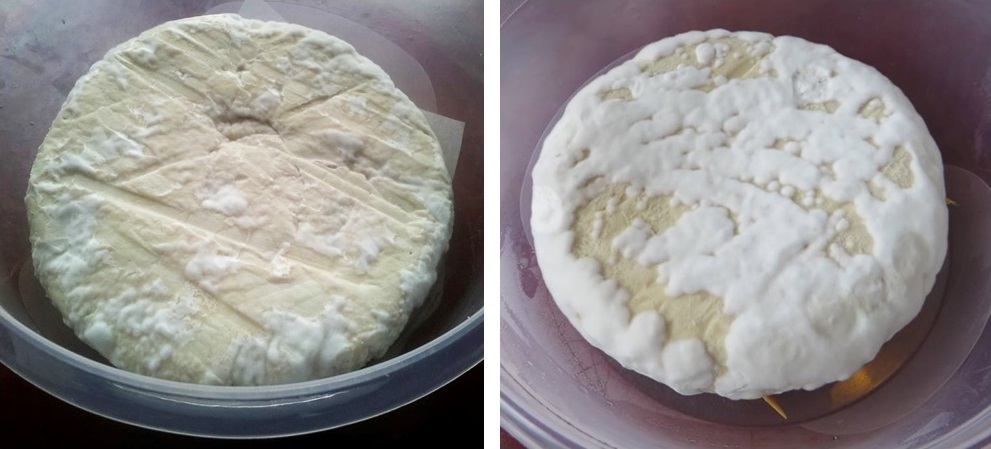
After five to six days the fungus will start to grow (see the pictures). It can have a grayish white or yellowish color. The cheese will continue to firm up and you will be able to place it on a sushi mat or dedicated cheese mat instead of the parchment paper to allow more air to reach its bottom. Keep turning the cheese regularly so it does not stick to the mat. If the fungus on one side of the cheese grows faster than that on the other side, you can leave the slow growing side facing up for a few days so it gets more air. However, keep lifting the bottom off the mat every day, to prevent sticking.
After about three weeks your cheese will finally be covered with a nice thick layer of white mold. You can now eat it, or keep it in the fridge a while longer. The mold will continue to grow.
Disclaimer
Trying any recipe from this site is done at your own risk, but that's especially true for experimental stuff like this. Study the instructions and maybe read up on fermentation a bit more before you begin. If you see other colors of mold, especially red or black, your cheese has been contaminated and it's best to discard it and start a fresh batch.
2 Reacties
Write a comment